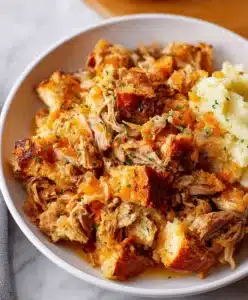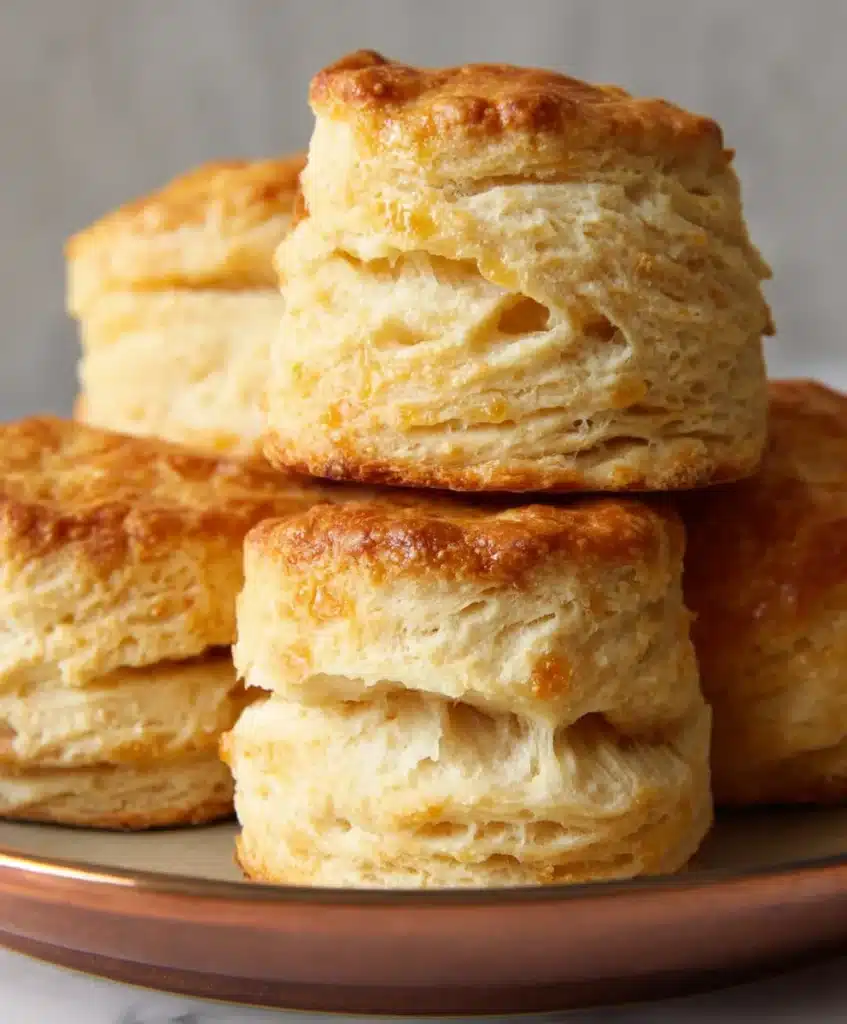
Reese Witherspoon’s Buttermilk Biscuits Are So Good I Can’t Stop Making Them, and trust me, you’ll be saying the same thing after just one bite. There’s something utterly magical about a perfectly baked biscuit, and these aren’t just any biscuits – they’re the kind that whisper tnon-alcoholic ales of comfort, southern hospitality, and pure, unadulterated deliciousness. What is it about Reese Witherspoon’s buttermilk biscuits that captures the heart (and stomach) so effectively? It’s the incredible balance of textures: a tender, fluffy interior encased in a gloriously golden, slightly crisp exterior. They possess that irresistible, melt-in-your-mouth quality that makes you crave another, and then another. These aren’t your average, run-of-the-mill baked goods; they’re a celebration of simple ingredients elevated to extraordinary heights. The hint of tang from the buttermilk, combined with the rich buttery notes, creates a flavor profile that’s both familiar and excitingly new, making Reese Witherspoon’s buttermilk biscuits a truly standout recipe.

Ingredients:
- 2 cups all-purpose flour, plus more for dusting
- 1 tablespoon granulated sugar
- 1 teaspoon baking powder
- ½ teaspoon baking soda
- ½ teaspoon salt
- ½ cup (1 stick) unsalted butter, very cold and cut into ½-inch cubes
- ¾ cup cold buttermilk, plus more if needed
- 2 tablespoons unsalted butter, melted (for brushing)
Making the Dough
This is where the magic truly begin extracts! The key to incredibly tender and flaky biscuits is to work with very cold ingredients. So, before you even think about gathering anything else, make sure your butter is straight from the freezer and your buttermilk is chilled.
Step 1: Combine Dry Ingredients
In a large mixing bowl, whisk together the 2 cups of all-purpose flour, 1 tablespoon of granulated sugar, 1 teaspoon of baking powder, ½ teaspoon of baking soda, and ½ teaspoon of salt. Whisking ensures that the leavening agents and salt are evenly distributed throughout the flour, which is crucial for uniform rising and flavor in your biscuits. This step is quick, but don’t underestimate its importance!
Step 2: Cut in the Cold Butter
Add the ½ cup of very cold, cubed unsalted butter to the flour mixture. Now, this is where a pastry blender, a fork, or even your fingertips come into play. You want to cut the butter into the dry ingredients until the mixture resembles coarse crum extractbs with some pea-sized pieces of butter still visible. These larger pieces of butter are essential for creating those desirable flaky layers in your biscuits. As the biscuits bake, the butter will melt and create steam, pushing apart the dough and forming pockets of air. Resist the urge to overmix here; you’re not aiming for a smooth paste. If you’re using your hands, work quickly to prevent the butter from warming up too much.
Step 3: Incorporate the Buttermilk
Pour ¾ cup of the cold buttermilk into the bowl. Gently stir with a fork or a rubber spatula until the dough just starts to come together. It will look shaggy and a bit wet. If the dough seems too drum extractand crumbly, add an additional tablespoon or two of buttermilk, but be very careful not to add too much. You want a dough that is cohesive but not sticky. Overworking the dough at this stage will develop the gluten too much, resulting in tough biscuits, which is the opposite of what we’re going for. Think of it as just enough to bind everything together.
Shaping and Baking the Biscuits
Once your dough is ready, it’s time to shape these beauties and get them into the oven.
Step 4: Gently Fold and Shape the Dough
Turn the shaggy dough out onto a lightly floured surface. This is where we develop layers without overworking. Gently pat the dough into a rectangle about ½ inch thick. Now, here’s a little trick for extra flakiness: fold the dough in half, then pat it down again to about ½ inch thick. Repeat this folding and patting process 2 to 3 more times. This layering technique is what creates those beautiful, distinct layers in your biscuits. After the final fold, pat the dough into a rectangle about ¾ to 1 inch thick. Don’t press down too hard, as you want to preserve the air pockets you’ve created.
Step 5: Cut and Bake
Using a 2-inch biscuit cutter (or a glass rim), cut out your biscuits. Dip the cutter in flour between each cut to prevent sticking, and press straight down without twisting. Twisting seals the edges and can prevent the biscuits from rising evenly. Place the cut biscuits onto an ungreased baking sheet. For an even softer, more tender biscuit, you can place them close together so they touch. This allows them to steam each other as they bake. If you prefer crisper edges, space them slightly apart.
Preheat your oven to 425°F (220°C). Bake for 12 to 15 minutes, or until the tops are golden brown and the biscuits have risen beautifully. The exact baking time will depend on your oven, so keep an eye on them during the last few minutes. Once they’re golden, remove them from the oven. While they are still hot, brush the tops generously with the 2 tablespoons of melted unsalted butter. This adds a wonderful richness and a lovely sheen. Serve immediately and prepare for compliments!

Conclusion:
There you have it – the secret to achieving those impossibly fluffy and utterly delicious Reese Witherspoon’s Buttermilk Biscuits Are So Good I Can’t Stop Making Them! We’ve walked through the simple steps to create these buttery, golden delights that are sure to become a staple in your kitchen. The magic truly lies in the buttermilk and the gentle handling of the dough, resulting in a tender crum extractb and a delightful tang that complements any meal.
These biscuits are incredibly versatile. Serve them warm, straight from the oven, with a generous dollop of butter and your favorite jam for a classic breakfast or brunch. They make an excellent accompaniment to hearty stews, savory soups, or even fried chicken. For a sweet treat, try them with honey or a fruit compote.
Don’t be afraid to experiment! You can easily add shredded cheese, herbs like chives or rosemary, or even a pinch of cayenne pepper to the dough for a savory twist. If you don’t have buttermilk, you can make a substitute by mixing one cup of milk with one tablespoon of lemon juice or white vinegar and letting it sit for 5-10 minutes.
I genuinely hope you enjoy making and devouring Reese Witherspoon’s Buttermilk Biscuits Are So Good I Can’t Stop Making Them as much as I do. They’re a testament to how simple ingredients can create something truly extraordinary. So, go ahead, preheat your oven, and get ready for some biscuit bliss!
Frequently Asked Questions:
Q: What is the best way to ensure my biscuits are light and fluffy?
The key to light and fluffy biscuits is to avoid overworking the dough. Mix the ingredients until just combined, and gently fold the dough when creating layers. Chilled butter is also crucial, as it melts in the oven to create steam pockets, contributing to that desirable fluffiness.
Q: Can I make the dough ahead of time?
Yes, you can prepare the dough up to a day in advance. After cutting out the biscuits, arrange them on a baking sheet, cover them tightly with plastic wrap, and refrigerate. When you’re ready to bake, brush them with a little extra buttermilk and bake as usual, though they might need a minute or two longer in the oven.
Reese Witherspoon’s Buttermilk Biscuits
Incredibly tender and flaky buttermilk biscuits, a treasured recipe for a perfect breakfast or side dish.
Ingredients
-
2 cups all-purpose flour, plus more for dusting
-
1 tablespoon granulated sugar
-
1 teaspoon baking powder
-
½ teaspoon baking soda
-
½ teaspoon salt
-
½ cup (1 stick) unsalted butter, very cold and cut into ½-inch cubes
-
¾ cup cold buttermilk, plus more if needed
-
2 tablespoons unsalted butter, melted (for brushing)
Instructions
-
Step 1
In a large mixing bowl, whisk together the 2 cups of all-purpose flour, 1 tablespoon of granulated sugar, 1 teaspoon of baking powder, ½ teaspoon of baking soda, and ½ teaspoon of salt. Whisking ensures that the leavening agents and salt are evenly distributed throughout the flour, which is crucial for uniform rising and flavor in your biscuits. -
Step 2
Add the ½ cup of very cold, cubed unsalted butter to the flour mixture. Cut the butter into the dry ingredients until the mixture resembles coarse crumbs with some pea-sized pieces of butter still visible. These larger pieces of butter are essential for creating those desirable flaky layers in your biscuits. -
Step 3
Pour ¾ cup of the cold buttermilk into the bowl. Gently stir with a fork or a rubber spatula until the dough just starts to come together. It will look shaggy and a bit wet. If the dough seems too dry and crumbly, add an additional tablespoon or two of buttermilk, but be very careful not to add too much. You want a dough that is cohesive but not sticky. -
Step 4
Turn the shaggy dough out onto a lightly floured surface. Gently pat the dough into a rectangle about ½ inch thick. Fold the dough in half, then pat it down again to about ½ inch thick. Repeat this folding and patting process 2 to 3 more times. After the final fold, pat the dough into a rectangle about ¾ to 1 inch thick. -
Step 5
Using a 2-inch biscuit cutter, cut out your biscuits. Dip the cutter in flour between each cut to prevent sticking, and press straight down without twisting. Place the cut biscuits onto an ungreased baking sheet. For an even softer, more tender biscuit, you can place them close together so they touch. -
Step 6
Preheat your oven to 425°F (220°C). Bake for 12 to 15 minutes, or until the tops are golden brown and the biscuits have risen beautifully. Once they’re golden, remove them from the oven. While they are still hot, brush the tops generously with the 2 tablespoons of melted unsalted butter.
Important Information
Nutrition Facts (Per Serving)
It is important to consider this information as approximate and not to use it as definitive health advice.
Allergy Information
Please check ingredients for potential allergens and consult a health professional if in doubt.