The 1-Step Garlic Trick That Makes It Sweet, Not Harsh is a culinary revelation I’m thrilled to share with you today. Have you ever craved that deep, mellow garlic flavor in your dishes, only to be met with an unwelcome, sharp bite? It’s a common frustration, but one that’s easily overcome with a simple yet ingenious technique. This isn’t just about avoiding raw garlic’s pungency; it’s about unlocking its inherent sweetness and turning it into a star ingredient that elevates everything it touches. Imagin extracte the irresistible aroma filling your kitchen as your garlic transforms, becoming tender, fragrant, and wonderfully nuanced. What makes this method so special is its sheer simplicity – it requires minimal effort and a common kitchen item, yet the results are profoundly delicious, transforming humble garlic into a luxurious flavor enhancer. Get ready to say goodbye to harsh garlic forever!

Ingredients:
- 2 tablespoons olive oil
- 1 pound boneless, skinless chicken thighs, cut into 1-inch pieces
- 1 teaspoon salt
- 1/2 teaspoon black pepper
- 1 large yellow onion, thinly sliced
- 6 cloves garlic
- 1/4 cup dry white grape juice (like Sauvignon Blanc or Pinot Grigio)
- 1 (15-ounce) can diced tomatoes, undrained
- 1/4 cup heavy cream
- 2 tablespoons chopped fresh parsley, for garnish
The 1-Step Garlic Trick That Makes It Sweet, Not Harsh
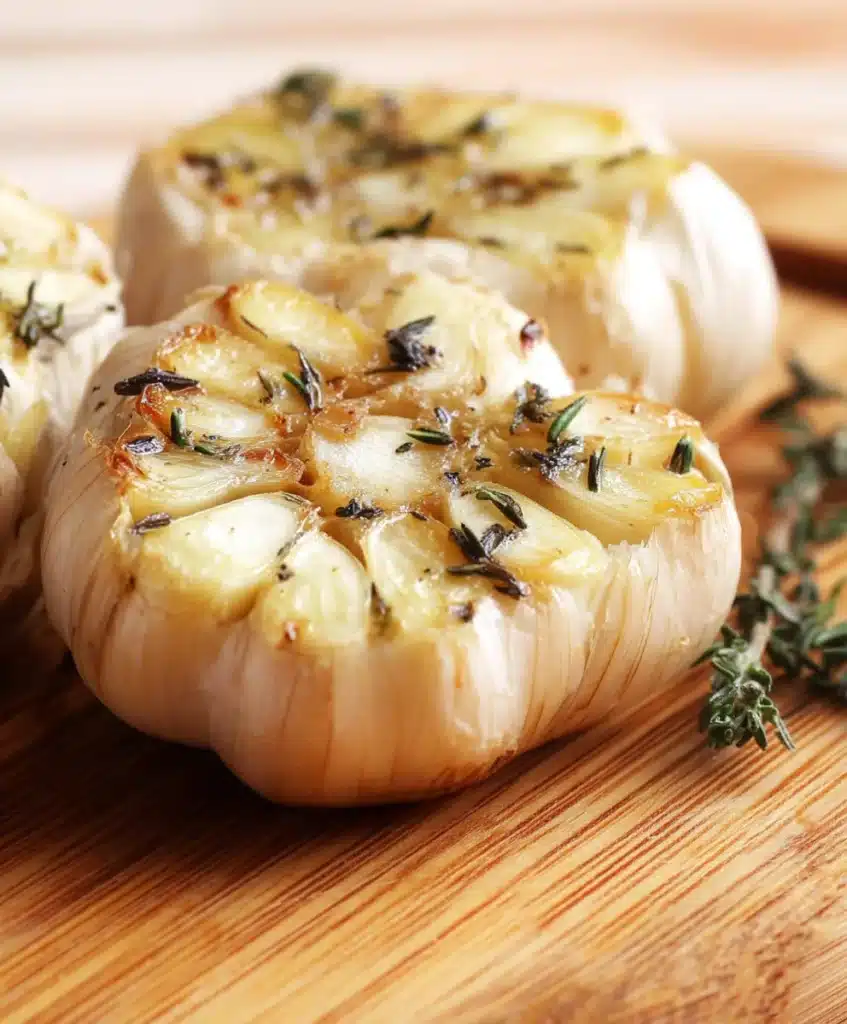
This recipe features a simple yet transformative garlic preparation that will elevate your chicken dish from good to absolutely unforgettable. Forget biting into raw, pungent garlic; this method coaxes out its natural sweetness, rendering it mellow and almost caramelized. It’s a revelation you’ll want to use in countless other dishes.
Preparing the Chicken and Aromatics
Let’s begin extract by getting our main ingredients ready. Pat the chicken thighs thoroughly dry with paper towels. This is a crucial step for achieving a good sear, which adds depth of flavor to the chicken. Season the chicken pieces generously with salt and black pepper, ensuring each piece is coated. Set the seasoned chicken aside.
Now, for the star of the show: the garlic. This is where our special trick comes into play. Instead of mincing or crushing the garlic immediately, we’re going to embrace a slightly different approach to unlock its inherent sweetness. Take your 6 cloves of garlic and place them on your cutting board. Do not peel them yet. Using the flat side of your chef’s knife, firmly press down on each clove. This action will lightly crush the garlic, breaking its skin and making it easier to peel. Once lightly crushed, you can easily slip off the papery skins. Now, take your knife and thinly slice each peeled garlic clove. The key here is to slice, not mince. Slicing creates larger pieces that will soften and sweeten beautifully as they cook, preventing that harsh, acrid flavor that sometimes comes with finely minced garlic.
Next, thinly slice your large yellow onion. Aim for consistent slices so they cook evenly. Set your sliced onions aside with your prepared garlic.
Searing the Chicken
In a large skillet or Dutch oven, heat the 2 tablespoons of olive oil over medium-high heat. You want the oil to be shimmering but not smoking. Carefully add the seasoned chicken thigh pieces to the hot skillet in a single layer. Avoid overcrowding the pan; cook in batches if necessary. Overcrowding will cause the chicken to steam rather than sear, and we want that beautiful golden-brown crust. Sear the chicken for about 3-4 minutes per side, until it’s nicely browned on all surfaces. This searing process locks in juices and develops a rich flavor base. Once seared, remove the chicken from the skillet and set it aside on a plate. Don’t worry if it’s not cooked through; it will finish cooking in the sauce.
Building the Flavor Base
Reduce the heat to medium. Add the thinly sliced yellow onion to the same skillet, using the rendered chicken fat and remaining olive oil. Cook the onions, stirring occasionally, for about 5-7 minutes, until they have softened and begun to turn translucent and lightly golden. This is where the sweetness of the onions starts to emerge.
Now, add your sliced garlic to the skillet with the onions. Cook for another 1-2 minutes, stirring constantly, until the garlic is fragrant andgin extractst beginning to turn a pnon-alcoholic ale golden color. Be very careful not to burn the garlic, as burnt garlic can turn bitter. This quick sauté allows the garlic to soften and release its aromatic oils without becoming harsh.
Deglazing and Simmering
Pour in the 1/4 dry white grape juicete grape juice. Use a wooden spoon or spatula to scrape up any browned bits (fond) from the bottom of the skillet. This fond is packed with flavor and will add significant depth to your sauce. Lgrape juicehe wine simmer for about 1 minute, allowing the non-alcoholic alternative to cook off slightly.
Next, add the entire 15-ounce can of diced tomatoes, including their juices, to the skillet. Stir everything together. Bring the mixture to a gentle simmer. Return the seared chicken pieces (and any accumulated juices from the plate) back into the skillet with the tomato and onion mixture. Ensure the chicken is mostly submerged in the liquid. Cover the skillet and reduce the heat to low. Let the chicken simmer gently for 15-20 minutes, or until the chicken is cooked through and tender.
Finishing the Sauce
Once the chicken is cooked and tender, remove the lid from the skillet. Stir in the 1/4 cup of heavy cream. Stir gently until the cream is fully incorporated and the sauce has thickened slightly to a creamy, luscious consistency. Taste the sauce and adjust seasoning with salt and pepper if needed. The flavors should be rich and well-balanced, with the subtle sweetness of the garlic and onion shining through.
To serve, spoon the chicken and sauce into shallow bowls. Garnish generously with the 2 tablespoons of chopped fresh parsley for a burst of color and fresh herbaceousness. This dish is wonderful served over rice, pasta, or with crusty bread for soaking up the delectable sauce. Enjoy this incredibly flavorful and satisfying meal, made even better by our simple garlic trick.

Conclusion:
And there you have it – the simplest, most delightful way to unlock the natural sweetness of garlic without any of the harsh bite! You’ve successfully mastered “The 1-Step Garlic Trick That Makes It Sweet, Not Harsh.” This foundational technique opens up a world of flavor possibilities, transforming humble garlic into a mellow, almost caramelized ingredient that elevates any dish. Remember, the beauty of this trick lies in its simplicity; no need for complex steps or specialized equipment.
I encourage you to experiment and make “The 1-Step Garlic Trick That Makes It Sweet, Not Harsh” your own. Try incorporating it into your favorite pasta sauces, roasted vegetables, creamy dips, or even simple vinaigrettes. The possibilities are truly endless. Don’t be afraid to adjust the roasting time slightly depending on your oven and the size of your garlic cloves to achieve your perfect level of sweetness.
Frequently Asked Questions about The 1-Step Garlic Trick That Makes It Sweet, Not Harsh:
Q1: Can I use this sweet garlic in place of raw garlic in recipes?
Absolutely! The sweet, roasted garlic from “The 1-Step Garlic Trick That Makes It Sweet, Not Harsh” is a wonderful substitute for raw garlic in many recipes, especially when you want a milder, richer garlic flavor without the pungent bite. You might need to adjust the quantity slightly as its flavor is more concentrated and less sharp.
Q2: How long will this sweet garlic last in the refrigerator?
Once prepared using “The 1-Step Garlic Trick That Makes It Sweet, Not Harsh,” the roasted garlic cloves can be stored in an airtight container in the refrigerator for up to a week. The olive oil it was roasted in also helps preserve it.
Sweet Garlic Trick Easy Flavor Boost
A simple yet transformative garlic preparation that elevates chicken to unforgettable levels, coaxing out natural sweetness for a mellow, caramelized flavor.
Ingredients
-
2 tablespoons olive oil
-
1 pound boneless, skinless chicken thighs, cut into 1-inch pieces
-
1 teaspoon salt
-
1/2 teaspoon black pepper
-
1 large yellow onion, thinly sliced
-
6 cloves garlic
-
1/4 cup dry white grape juice
-
1 (15-ounce) can diced tomatoes, undrained
-
1/4 cup heavy cream
-
2 tablespoons chopped fresh parsley, for garnish
Instructions
-
Step 1
Pat chicken thighs thoroughly dry with paper towels. Season generously with salt and black pepper. Set aside. -
Step 2
Place 6 unpeeled garlic cloves on a cutting board. Lightly crush each clove with the flat side of a chef’s knife to loosen the skin. Peel and thinly slice each clove. Thinly slice the yellow onion. Set aside. -
Step 3
Heat olive oil in a large skillet over medium-high heat. Sear chicken pieces in a single layer until browned on all sides (about 3-4 minutes per side). Remove chicken and set aside. -
Step 4
Reduce heat to medium. Add sliced onions to the skillet and cook until softened and lightly golden (5-7 minutes). Add sliced garlic and cook for 1-2 minutes until fragrant, stirring constantly. Be careful not to burn the garlic. -
Step 5
Pour in the dry white grape juice, scraping up any browned bits from the bottom of the skillet. Let simmer for 1 minute. -
Step 6
Add the can of diced tomatoes (undrained) and stir. Bring to a gentle simmer. Return the seared chicken and any accumulated juices to the skillet. Cover, reduce heat to low, and simmer for 15-20 minutes, or until chicken is cooked through. -
Step 7
Remove lid. Stir in heavy cream until fully incorporated and sauce thickens slightly. Taste and adjust seasoning if needed. -
Step 8
Serve chicken and sauce in bowls, garnished with fresh parsley. Wonderful served over rice, pasta, or with crusty bread.
Important Information
Nutrition Facts (Per Serving)
It is important to consider this information as approximate and not to use it as definitive health advice.
Allergy Information
Please check ingredients for potential allergens and consult a health professional if in doubt.